

All your questions answered
neoRange: Frequently Asked Questions
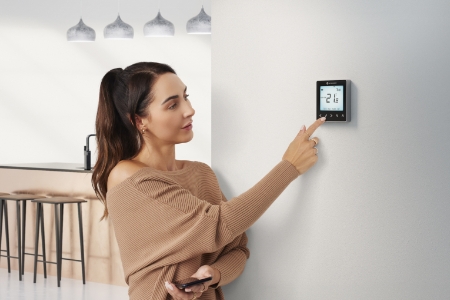
Designed for simplicity, versatility, reliability and smart control, the neoRange smart home temperature control system is fully customizable to both your installation needs and those of your customers.
With many options available, here’s a handy guide to answer your questions.
neo System
neo System
10 neo System tips
- The neoStat can replace a standard 3 wire (excluding earth) thermostat.
- The models within the neoRange can control Radiator systems, Water and Electric Based underfloor heating systems, Towel Rails and Hot water tanks.
- All devices work independently of the neoHub. (neoHub only required if you want app control).
- Should your internet connection or the cloud server/hub fail, your heating will continue to operate to the programmed times that are stored in each neo Thermostat. The neoHub will automatically reconnect to our server when the service is restored.
- Powered neo Thermostats create a mesh network - extending the communication distance around your home by repeating the signals.
- Battery powered neoAir thermostats can join a mesh network but do not repeat signals, so you may need more repeaters on a system with only neoAir.
- neoStat-e is the model for controlling electric floor heating.
- You can use remote wired sensors with neoStats but you need neohub to use the wireless air sensors.
- neoStats can switch your appliance directly (You should check the power rating) or you can use a wiring centre to simplify the installation wiring.
- neo doesn't use WiFi, so we recommend a boost to be installed per floor in your home to ensure good network coverage.
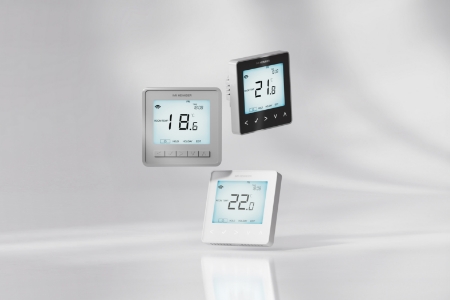
Which neo do I need?
All of the following neo work with the neoHub and you can mix these on the same system.
neoAir is our battery powered wireless version. It works with the 2 Channel Receiver RF Switch or the 8 Zone Wireless wiring centre UH8-RF.
neoStat is our 230v powered programmable thermostat. It can replace any 3 wire thermostat.
neoStat-e is our electric floor heating model. It can switch up to 16A.
What history does the neo System record?
You can view the last 7 day temperature log for each zone in the neoApp or you can enable Enhanced history and record 13 monthsof data.
Does Neo support multiple homes?
Yes, with neo you can control more than 1 home in the neoApp.
Can I share the system?
Yes you can share the system with other users. Depending on whether the user is setup as a Guest or Admin will determine their level of control.
Admin users have access to everything
Guest Users do not have access to:
- Delete the location
- dd/Remove/Retitle/Attach Zones
- Access thermostat zone settings
- Access/Run Profiles (via profiles or recipes)
- Access GeoLocation
- Access any other system settings.
- Share the system on to any other users. Only the owner can share the system.
What happens when the Contact Sensor triggers?
When the contact sensor triggers, and any preset delay has expired, the zones you have linked will switch to Frost mode.
Can I override this state on the neoStat?
Yes, you can override the state. The neoStat will then operate to its normal programming mode but will switch off the next time the window or door is opened.
Do I need to use a wiring centre?
When your neo device is paired to your neohub it is given a secret key, this secure the network and locks the neo device to that particular neohub.
This means that If your neoStat / neoAir have been previously paired to the neoHub and not removed you will need to reset it before you can pair to another neoHub.
Resetting the neoStat will delete all programmed settings.
You can tell if its currently paired to a neoHub by these steps:
neoStat v2 (White Display Light)
- Navigate to Power Icon
- Press TICK for 5 seconds
- Select Setup
- Press Tick
- You will see a small 01 in the top right corner
- If you see a WiFi icon, it means its paired to a neoHub
- You will need to reset it before you can pair again to a new neoHub
To reset, follow these steps:
On the neoStat v2 (White Display Light)
- Navigate to Power Icon
- Hold Tick for 5 seconds
- Select Setup and Hold for 10s until you see all icons appear on screen
- The neoStat has now reset and all data will be reset to factory default
- Now try to re-pair to your neoHub
How to re-pair my neoStat to the neoHub?
Air have been previously paired to the neoHub and not removed you will need to reset it before you can pair to another neoHub.
Resetting the neoStat will delete all programmed settings.
You can tell if its currently paired to a neoHub by these steps:
neoStat v2 (White Display Light).
How to enable enhanced History on neoHub Gen 2?
To enable enhanced history on your neoHub Gen 2.
- Ensure your app is running the latest version
iOS = 3.0.43 Android = 5.1.20 - In your neo app, navigate to Settings/Enhanced History and Turn toggle this to ON.
Please note, if you do not see the Enhanced History menu in your app it means your neoHub is running an older firmware. Please wait a few days for your neoHub to receive the update or email [email protected] for the team to force the update to your hub. Remember, this function is only available on the neoHub Gen 2. Please note, Enhanced History is not supported on our Windows app
neoApp
What are the steps to setup the system?
- Set your Time Zone
To set your Time Zone, follow these steps.
We support UK, CET, NZ and China Time. Customers in other countries should select Other and manually enter the time. You will need to adjust your clock for any Summer / Winter adjustments.
The default is UK (which will auto correct for Winter/Summer time), if you want to change follow these steps
Press Settings
Press Date/Time
Select the desired Time Zone
- Set the desired Temperature Format
Decide if you want the system to operate in degrees C or degrees F temperature format.
The default is C, if you want to change follow these steps
Press Settings
Press Temperature Format
Select C or F
- Decide what program mode you want the system to operate to.
neo can work in the following modes
Non Programmable (No time settings, you simply set a temperature)
5/2 (Weekdays are the same, weekend is different)
24 Hour (All days are the same)
7 Day ( All days different)
The default is 5/2, if you want to change follow these steps
Press Settings
Press Program Mode
Select the desired option
- Decide how many levels you require per day.
neo offers 4 or 6 level programming per day - this is the number of different temperature settings you can program.
The default is 4, to change follow these steps.
Press Settings
Press Heating Levels
Select the desired option
- Decide if you want Automatic Preheat.
neo can automatically preheat your home, this means bringing your heating on before you scheduled time to ensure your home is warm for the times you have programmed. This is a zone per zone settings and the default is off, to turn on follow these steps
In the Zone screen, press the Slider icon
Select Optimum Start
Enter the maximum Preheat time here (e.g 3 hours)
This setting is a limit on the amount of preheat the thermostat will use. This time is the maximum preheat you want the thermostat to use. The thermostat will calculate exactly how much preheat time is required, and will automatically adjust this day by day. Setting 0 disables this function.
- Decide how quickly you want the heating to come back on
neo can switch the heating back on when the heating falls to 0.5, 1, 2, 3C below your set temperature. This is a zone per zone settings and the default is 1C, to change this, follow these steps
In the Zone screen, press the Slider icon
Select Switching Differential
Select the desired option
How do I pair my neoStat v2 (White Display)
After pairing the neoHub,
- Press Add neoStat
- Enter the Zone Title or select from the available titles
- Press Next
- On the neoStat v2, navigate to the power Icon and hold tick for 5 seconds
- Navigate to Setup
- Press Tick twice
Your neoStat should show the radio signal on screen and the app should indicate the zone has been added successfully.
Adding a zone inside the neoApp
- Press Home, so the Home button is orange
- Press Edit, in the top right corner of the screen.
- Press Add Zone
- Enter the Zone Title or select from the available titles
- Press Next
- On the neoStat v2, navigate to the power Icon and hold tick for 5 seconds
- Navigate to Setup
- Press Tick twice
Your neoStat should show the radio signal on screen and the app should indicate the zone has been added successfully.
If your neoStat doesn't pair, try the following steps.
- On the neoStat, navigate to the Power Icon and Hold the tick key for 5 seconds.
- When you see Setup on screen, press and hold for 10 seconds until you see all icons appear.
Your neoStat has now been reset. Please re-try the steps above.
How do I change my email for the neoApp?
To change your login email, follow these steps.
- Press Home
- Press Locations
- Press Back / Logout
- Press Register
- Enter your new email and password
- Press Continue
- Login to your new account
- Press Add neoHub
- Press Connect on your neoHub. (Ensure you are connected to the same router)
- Press Finish
All of your zones will be visible in your app and profiles will migrate over. You will need to setup any recipes.
How do I set the clock on my system?
- Navigate to Settings
- Select Date & Time
- Select your Time Zone
- UK/CET will automatically adjust the time for Summer/Winter Time.
Smart Home Integration
How does HomeKit communicate with the neo devices?
In the Home
When you are in the home, your iPhone will communicate directly with the neoHub
Remotely
When you are away from home, your iPhone will communicate via iCloud to an Apple TV, iPad or HomePod in your home and then to the neoHub.
How do I setup HomeKit?
Before you follow these steps, ensure you have setup your neo system using the steps outlined here.
Using iOS Home App
- Press +(Top Right)
- Press Add Accessory
- Scan the code on the rear of your neoHub
- The Home App should report the neoHub has been found - tap it to select
- You will now be prompted to place each neo device in a room
- Repeat for each zone
Using neoApp
- Press Settings
- Press HomeKit
- Select or Create a New Home
- Select Add a New Accessory
- The neoApp should report the neoHub has been found - tap it to select
- You will now be prompted to place each neo device in a room
- Repeat for each zone"
Thermostats
Enabling Frost Protect Mode
Frost Protect mode will bypass your programmed heating levels but will maintain a low temperature in your home. Only when your home drops below this temperature will the heating be activated.
The default frost protect temperature is 12C but this can be adjusted from 5-17 degrees C or disabled.
- Enable: Navigate to the Power Icon and Press Tick. You will see the frost icon appear.
- To Cancel: Navigate to the Power Icon and Press Tick again. You will see the frost icon disappear.
To adjust a neo use the left or right arrows to scroll to the power icon tap the tick button on the power icon once so that the snowflake appears, and then tap the arrow up or down, it will start on the current frost temperature, if you want to change this use the up/down arrow keys and when you get to the temperature you want tap the tick button.
To adjust the Edge model thermostat use the left or right arrows to scroll to the power icon tap the tick button on the power icon once so that the snowflake appears, and then tap the arrow up or down, and it will start on the current frost temperature, if you want to change this use the up/down arrow and when you get to the temperature you want tap the tick button.
What is Optimum Start?
The Heatmiser Thermostats have a function called Optimum Start.
Optimum Start pre-heats your home and will automatically learn how long your home takes to heat up. As the seasons change, your thermostat will react by updating this preheat time which will bring the heating on earlier in autumn and winter and later in spring and summer
Two settings are used for this function.
- Optimum Start
- Rate of Change (ROC)
Optimum Start is the maximum number of hours the thermostat will turn the heating on before your scheduled time. The thermostat may not use all of this time, it's a way to limit the total preheat time and is used in very cold buildings. A value of 00 means the function is disabled. We suggest 3 hours for most homes. This is set on a per zone basis.
Rate of change is the number of minutes it takes to heat your home by 1C. Your thermostat constantly updates the ROC (Rate of change) setting by checking if the heating was at temperature on time, too early or too late, and based on the result changes this setting.
How do I program the comfort levels on the neoStat?
"he neoStat offers three program mode options;
- Weekday/Weekend programming
- 7 Day programming
- 24 Hour programming
When thermostats are connected to the mesh network, the program mode for
the system is configured by using the neoApp.
The thermostat is supplied with comfort levels already programmed, but these can be changed easily.
The default times and temperature settings are;
- 07:00 - 21°C (Wake)
- 09:00 - 16°C (Leave)
- 16:00 - 21°C (Return)
- 22:00 - 16°C (Sleep)
If you only want to use 2 levels, you should program the unused levels to --:--
For Weekday/Weekend programming the four comfort levels are the same for Mon-Fri, but can be different for Sat-Sun.
For 7 Day programming each day of the week can have four different comfort levels.
In 24 Hour mode all days are programmed with the same comfort levels.
To program the comfort levels
- Use the Left/Right keys to scroll to EDIT
- Press TICK
- Use the Left/Right keys to select day/period of the week (this will flash)
- Press TICK to confirm
- WAKE will now flash and the current time and temperature will be shown.
- Press TICK to alter WAKE
- Use the Up/Down keys to set the HOURS
- Press TICK
- Use the Up/Down keys to set the MINUTES
- Press TICK
- Use the Up/Down keys to set the temperature
- Press TICK
- Press the right arrow key
- LEAVE will now flash and the current settings will be displayed
- Press TICK to alter LEAVE
- For any unused periods set time to --.--
- Use the Left/Right keys to scroll to DONE and press TICK
How do I install the neoStat?
Installation Procedures
- Mount the thermostat at eye level.
- Read the instructions fully so you get the best from our product.
- Don’t install near to a direct heat source as this will affect functionality.
- Do not push hard on the LCD screen as this may cause irreparable damage.
The neoStat V2 is designed to be flush mounted and requires a back box of 35mm (minimum depth) to be sunk into the wall prior to installation.
Step 1
Using a small screwdriver, slightly loosen the screw from the bottom face of the thermostat. Then carefully separate the front half from the back plate.
Step 2
Place the thermostat front somewhere safe. Terminate the connections to the thermostat as shown in the wiring diagrams in the booklet.
Step 3
Screw the thermostat back plate securely into the back box.
Step 4
Clip the front of the thermostat onto the back plate, securing it in place with the retaining screw.
Get closer to the neoRange
Using your neoRange
Discover key features, benefits and how to set up your neoRange system
A new level of underfloor heating
Simplicity, versatility, reliability and smart control. Explore what the neoRange has to offer.
Looking for technical documentation?
Here you can find our datasheets, manuals and more
Get in touch with our underfloor heating experts